Real coffee geeks will do almost anything in their power to get the daily cup of perfectly extracted Coffea Arabica: Even if it means a great deal of inconvenience.
Begging cabin crew for hot water so that you can renew your membership of the #milehighaeropressclub? Yes, I have been there. And I’m sure many of the people who read this have, too.
For this reason, there’s something slightly hypothetical about writing an article about making coffee without a coffee maker. I mean, who would get into that kind of situation in the first place?
If I have a problem, it’s the opposite; having too many coffee makers.
That being said, there’s something fascinating about entertaining the thought: How would it be to brew coffee under truly impossible circumstances? With the world facing a pandemic right now, being a ‘prepper’ is not paranoid, it’s just due diligence.
So let us at least try it as a practical experiment. How good coffee can we actually brew without all our fancy equipment? I’ll test four methods (two without a filter and two with) and give you my assessment.
Cupping
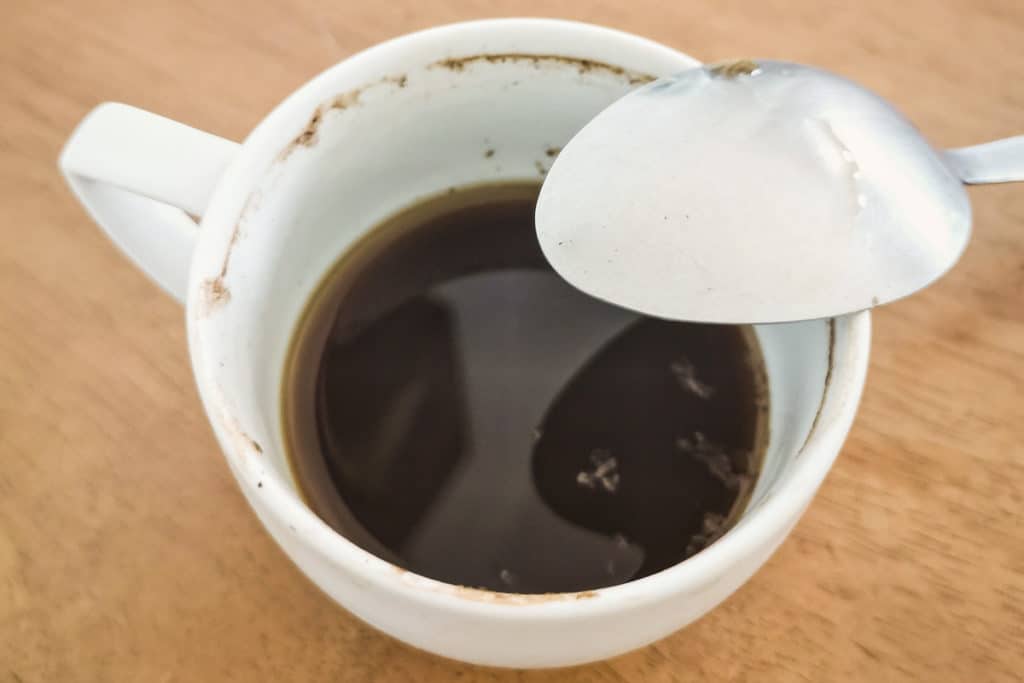
Requirements: A cup (a bowl or glass will also do) and 1 or 2 spoons.
Cupping is the most elementary kind of coffee brewing we have. It’s also a pretty tasty one. So if you don’t have a coffee maker, it’s an excellent occasion to start cupping.
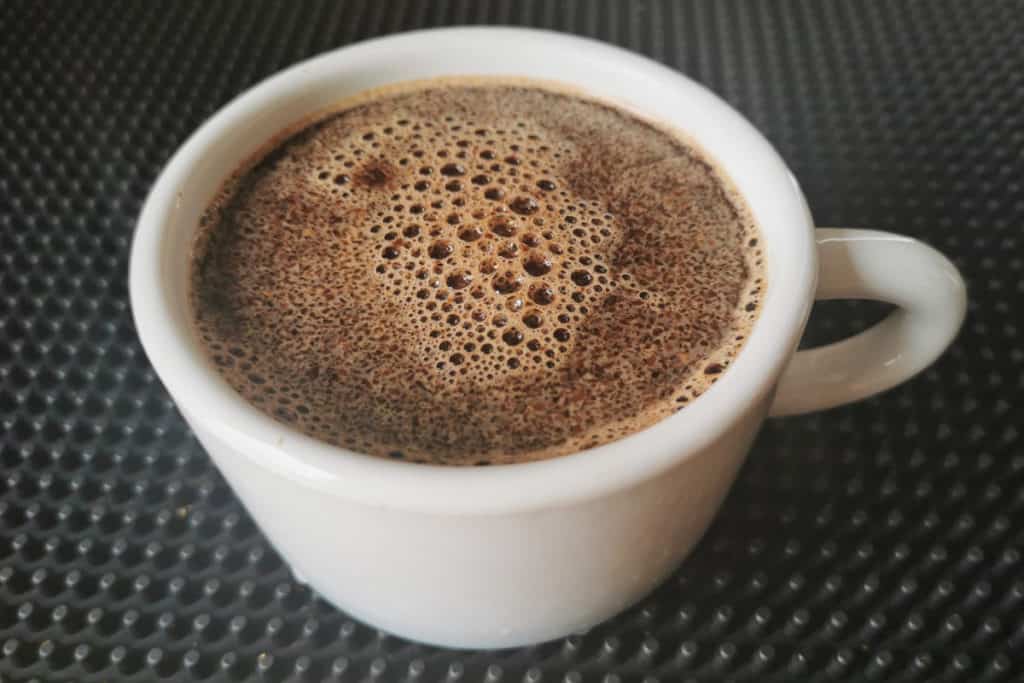
Cupping is both simple and advanced. If you read the official guidelines from the Specialty Coffee Association, every little step will be described in detail. But since you’re stuck at home without a coffee maker, you probably won’t be able to follow their protocol to a tee.
- Ideally, you’d use a ratio of 55 grams of coffee to a liter of water, but that’s hard to measure if you don’t have a digital scale.
- A heaped spoonful of ground coffee is usually around 6 grams, and for me a handful of coffee beans is 12 grams, which should work pretty well for a small mug or cappuccino cup.
- Add coffee grounds to a wide-mouthed cup (glass or bowl is also okay), and fill it to the brim with water a few minutes off the boil.
- A thick crust of coffee should then form. Wait four minutes, and then gently stir the surface to break the crust. After this, some brownish foam will remain on the surface. This foam adds a dry and harsh taste to the cup, so gently skim it off with a spoon.
The coffee will be ready for sipping now, but it will be really hot, so I usually like to wait an additional two to four minutes.
Evaluation:
If you have never tried cupping before, it might seem a bit weird at first. But after you have gotten used to it, it’s delightful.
As a Q Grader, I’m accustomed to using cupping as an evaluation tool; however, I have never really tried to use it for ‘plain’ drinking.
It turns out that it’s both a convenient and enjoyable brewing method. You’ll be surprised how little silt there is in each sip when you use the spoon to scoop up coffee carefully.
Of course, you can also skip the spoon and drink directly from the cup. However, unless you’re very cautious, this will agitate the grounds, leaving you with a more ‘dirty’ mouthfeel.
The downside of cupping is that there’s a very high ‘liquid retained ratio’ as is the case with immersion brewing methods in general. With cupping, however, you’ll waste even more coffee than you would with a French press since there’s no filtration whatsoever.
Flavor: 5 out of 5
Practical use: 2 out of 5
Cowboy Coffee aka Koke-kaffe
Requirements: A kettle or casserole and 1 or 2 spoons for stirring
This kind of coffee is called Cowboy Coffee in the US and ‘Koke Kaffe’ in Scandinavia, which can roughly be translated to ‘boiled coffee’.
You can brew it in a regular casserole or, even better, a stainless steel kettle. It’s popular among hunters, trekkies, and wildlife people in general.
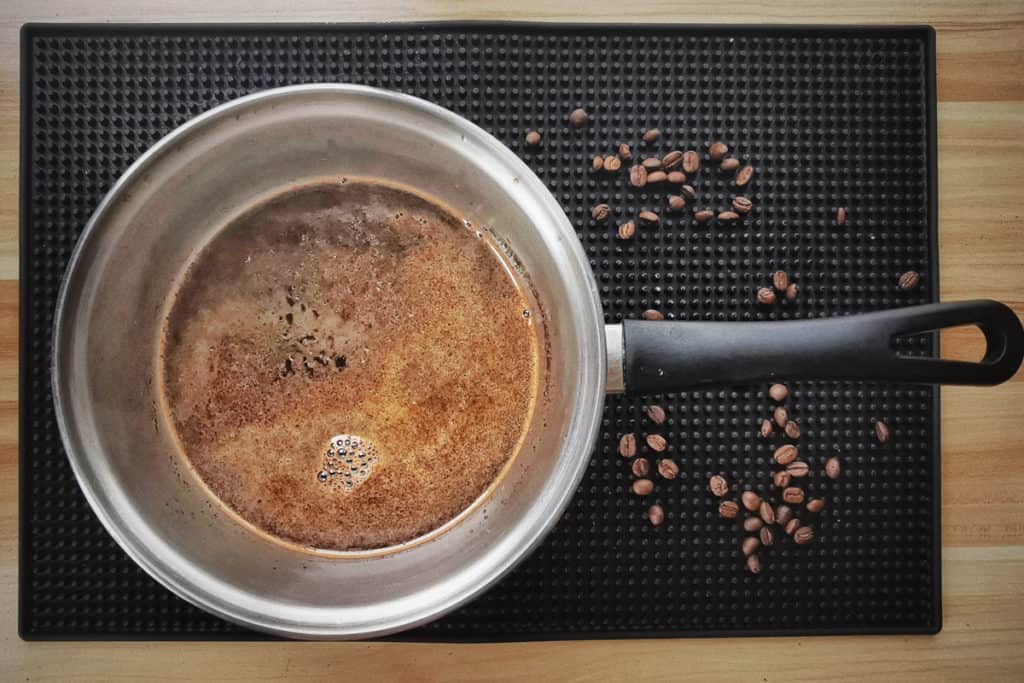
I could give you an exact recipe, but it’s not really in the spirit of this type of coffee. Typically, you’d heat water to a boil, add coffee, and stir it a few times before letting it steep.
For how long? Approximately the time it takes to tell a good anecdote while you sit at the bonfire.
If you want more specific guidelines, this brewing advice for the French press also applies to Cowboy Coffee.
Evaluation:
Cowboy coffee is rather simple to prepare, and you can brew big batches easily since most pots have a huge volume compared to the typical specialty coffee brewing contraptions.
There are two main problems with the brewing method as I see it:
- You need to clean your pot or casserole thoroughly. Flavors from your spaghetti bolognese and coffee don’t mix well.
- It’s difficult to pour or scoop up the coffee without disturbing the grinds, which creates a dirty mouthfeel in the final cup.
I struggled to finish my cup of cowboy coffee. The extraction was on point; however, it had a bit of an off-flavour and a slightly dirty mouthfeel.
If you have a steel kettle that has only been used for water and coffee, however, you’ll probably achieve better results.
Flavor: 2 out of 5
Practical use: 3,5 out of 5
Tea Bag Method
Requirements: Any kind of paper coffee filter
If you have paper filters lying around but no coffee maker, the tea-bag method comes to mind intuitively.
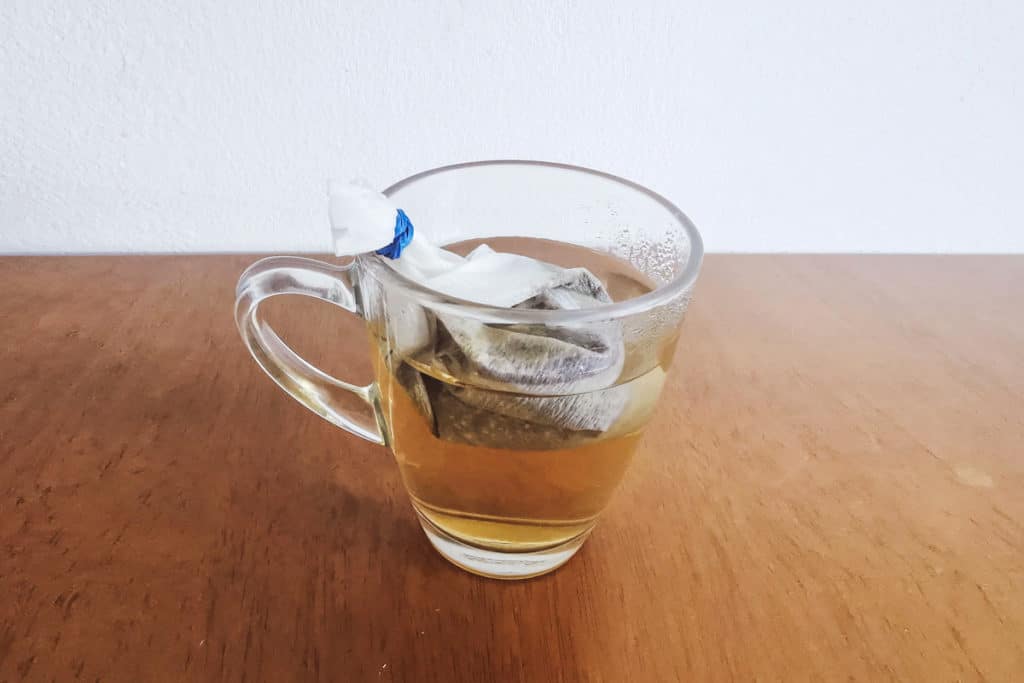
Add coffee grounds to your paper filter, whether it’s cone-shaped or Melitta-style. Roll the paper around a few times, and wrap it up securely, and just dump it into a cup, like you would with a normal tea-bag.
You will need a very fine grind-size coupled with boiling water and generous, steep time to make it work.
Also, unless you rinse the paper filter in advance, you’ll have a lot of paper taste diluted into a single cup of coffee, which is not a good idea.
Evaluation:
There are some fundamental differences between the small sachets used for tea and coffee filters. Teabags are more porous, allowing for easier extraction.
I learned this the hard way. After 6 minutes of steeping the relatively finely ground coffee, the coffee was more similar to tea when it comes to turbidity. It tasted thin and under-extracted.
I tried to stir the bag around aggressively, which helped. Still, it was a tepid and weak cup after more than ten minutes of steeping time.

After the experiment, I found out that there is an American brand named Steeped Coffee, which uses the ‘right’ tea sachets. No wonder.
Flavour: 2 out of 5
Practical use: 2 out of 5
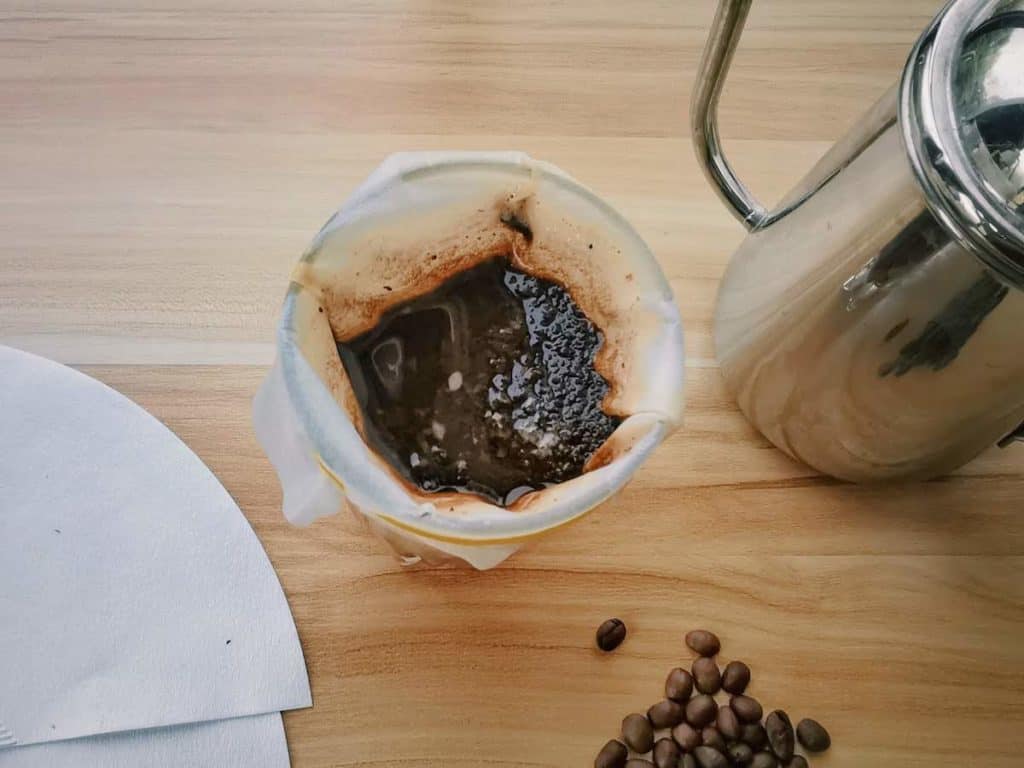
DIY Chemex
Requirements: Paper coffee filter, rubber band, and a tall glass
The next method is less intuitive than the tea-bag method, but it’s way more effective.
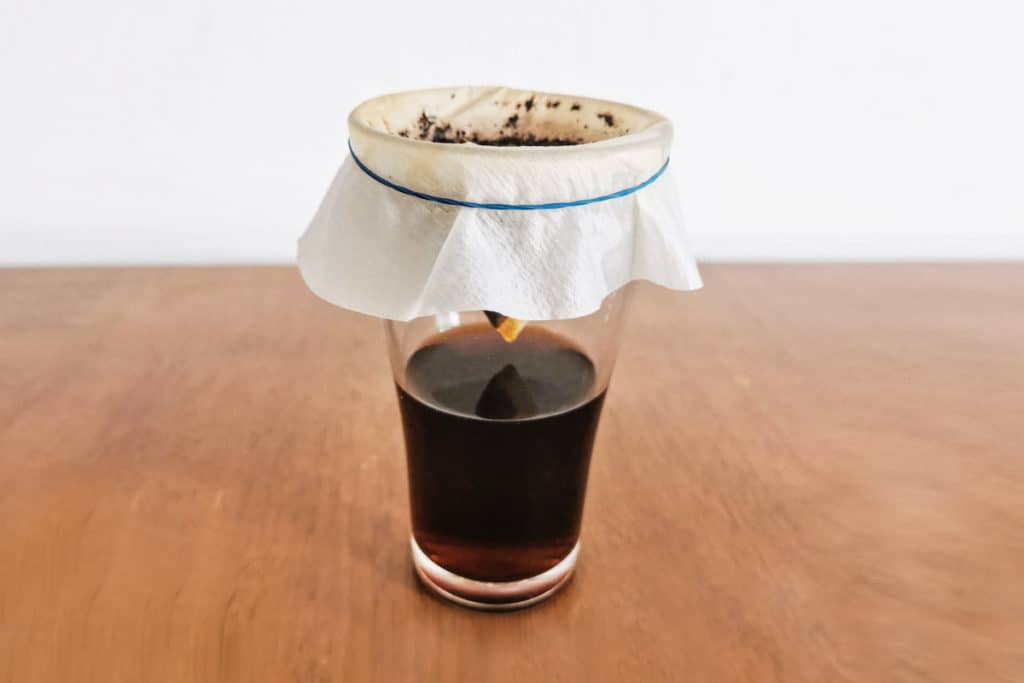
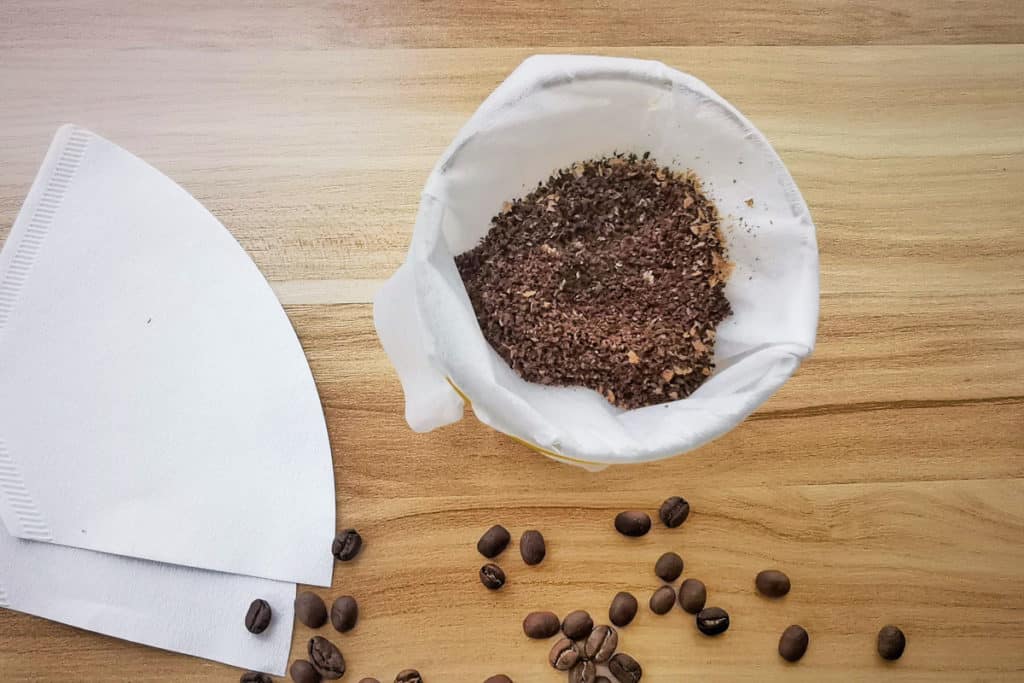
If, for some reason, you have some paper filters around but no pour-over cone, it’s straightforward to make what you could call a DIY Chemex. It just requires some basic origami skills and tools available in any home.
First, find a tall glass that looks like it can handle hot liquids. Then place your paper filter in the glass and open it gently.
Wrap the edges of the paper filter around the glass and press the edges to create a fold. Then take your rubber band and put on the border outside the glass, so it keeps the filter in place. You now have a DIY-Chemex.
Evaluation:
At my first pour, I noticed something unexpected: The paper started to swell up like an airbag, almost compressing the coffee grounds.
I hadn’t considered this in advance, but of course, this was due to the steam not being able to escape from the glass.
I poked a couple of small holes in the filter, and luckily that was enough to let the steam out. From then on, I just continued with pulse pours, making sure not to overfill the small cone.
I was blown away by the flavour. It was as good as a regular pour-over. But due to my slightly unorthodox approach, there was something different about it.
Maybe it was because of my longer bloom time? The frequent, small pours? The higher dose? I’m not sure, but I have to experiment more with this brewing style.
Flavour: 4,5 out of 5
Practical use: 4 out of 5
Conclusion: How to Make Coffee without a Coffee Maker
If you ever find yourself in a situation where you have no coffee maker but still have access to a paper filter, I highly suggest that you try the DIY-Chemex. It works way better than expected.
However, if you can only get access to a cup and some boiling water, I wouldn’t discount cupping. If you’re used to drinking something like French Press, you’d be surprised that cupping tastes a bit cleaner.
Before this experiment, I was pretty worried about whether it was possible to make good coffee without all my fancy equipment. But even everyday utensils and eyeballing can give you decent results.
If the apocalypse ever comes, I’m sure we’ll still drink some decently extracted coffee.