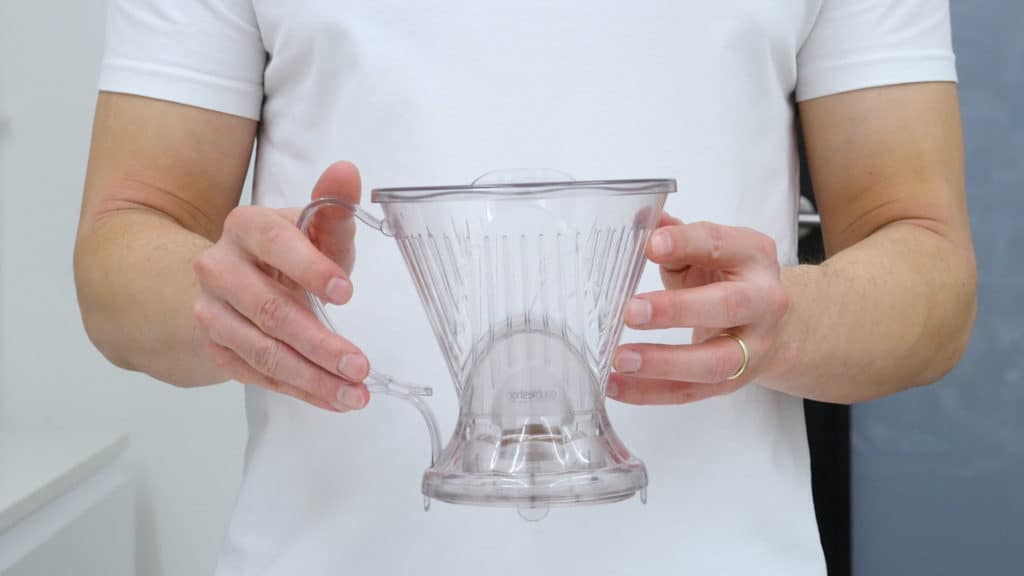
In this tutorial, we’ll be showcasing the Clever Dripper, as a top-notch alternative home brewing method. The Clever Dripper is actually one of the very first coffee brewers that I ever owned and used to make myself a coffee at home. It might not be the most gorgeous gizmo to grace the speciality coffee scene, but it’s a fantastic, nifty little gadget that holds a firm place in my heart.
I still remember the first conversation that I had about the Clever Dripper – it was with an innovative specialty coffee roaster, who was forever introducing me to the latest big things in the world of coffee. They said that, if they could choose only one brewing method for the rest of their life, they would choose Clever Dripper.
I am not sure whether or not I would say that I agree with them, but I do understand the reasons behind this claim – the Clever Dripper ticks all the boxes for an easy to use, reliable and consistent brewing method of choice.
A secret weapon of Clever Dripper is…
The secret weapon of Clever Dripper is the valve. It allows users to combine immersion coffee brewing (like you would with French Press) with drip coffee brewing (like in V60 or Chemex brewing methods). Back when we were making a movie covering the AeroPress method, we actually found out that the AeroPress inverted method was modelled after, at that time, the popular Clever Dripper.
Nowadays, a similar principle is used by other brewers, such as the Bonavita Immersion Dripper, Wilfa Pour Over or GINA by Goat Story (what you’ll find with all of these, however, is that they’re much more expensive).
So, without further ado, below you’ll find our tutorial for making coffee with the Clever Dripper. Along the way, we’ll also be going through some of the main advantages and disadvantages of this brewer, as well as some additional brewing tips and cleaning instructions.

Our Clever Dripper recipe
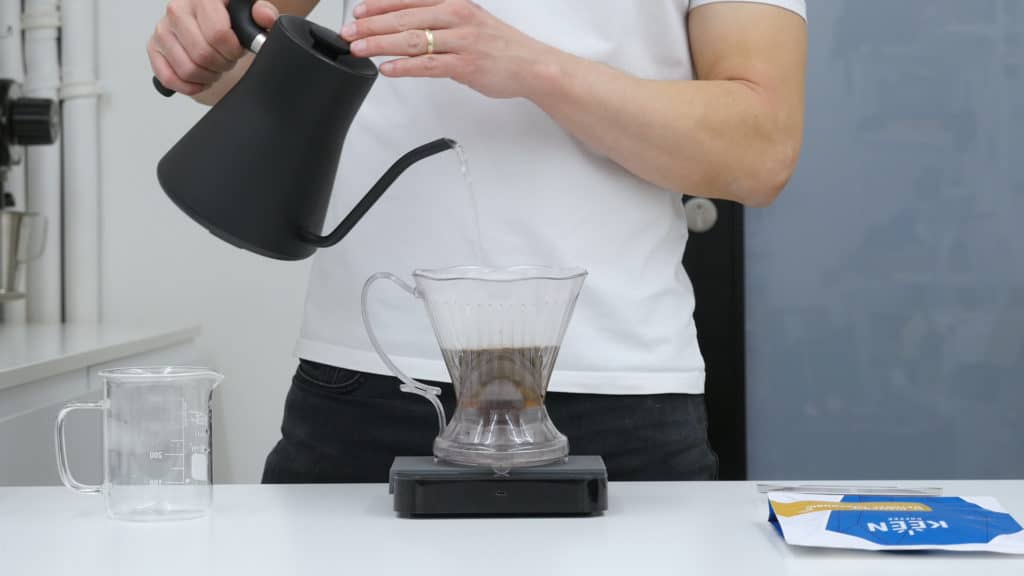
- This recipe requires 20g of coffee and 300g of water.
- Use a coarse grind size for your coffee (about 30 clicks on the Comandante grinder) and then a long brew time. This should be around 4 minutes of steep time and a further 1-minute dripping time, so about 5 minutes total brew time.
- First, fold up the paper filter, and position it in the Clever Dripper. Then rinse the paper filter and heat up the brewer.
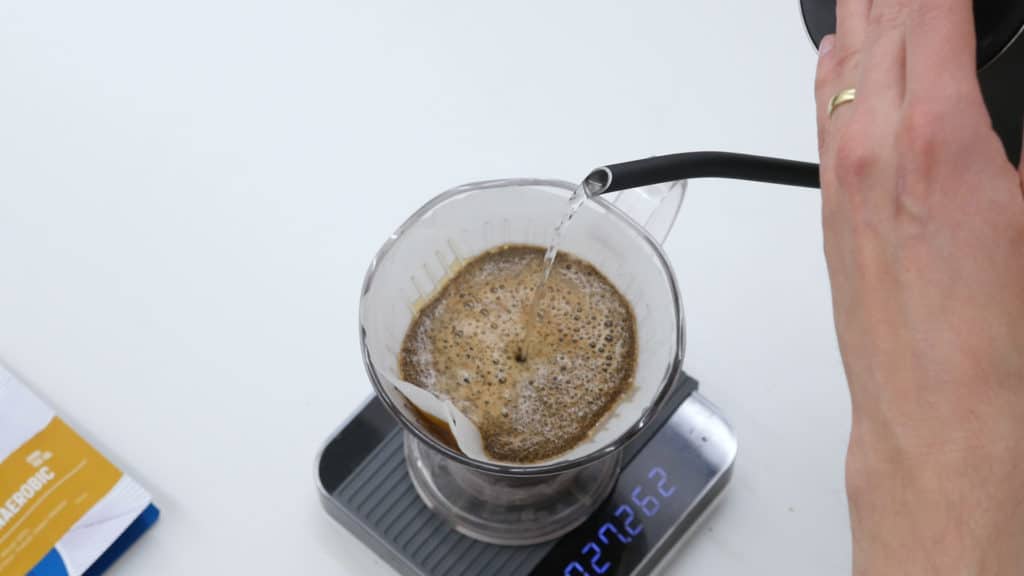
- Add the coffee and pour in all 300g of water at once – no specific pouring technique is required. Cover the dripper with a cap and let it steep for about 2 minutes.
- Then give it a gentle stir with a spoon to break the crust on the top. Cover the dripper again and wait for a further 4 minutes.
- Finally, place the Clever Dripper on a carafe and let the coffee drain through (this should take about one minute).
In general, Clever Dripper recipes range from 2 to 4 minutes of total brew time, and you just need to adjust the grind size accordingly. Personally, we like to opt for the longer brews, simply because it gives you more time to clean the kitchen or prepare your breakfast.
Clever Dripper review
So, now that you know how to prepare yourself a Clever Dripper coffee, let’s go on to discuss some advantages and disadvantages of this particular method.
Advantage of the Clever Dripper
- No pouring skills are required (you don’t need a kettle with gooseneck).
- It’s a cheap piece of kit (the standard price is about 20 euros).
- It’s light and hard to break.
- You can use it to make big batches of coffee too (up to 400 ml at a time).
Disadvantages of the Clever Dripper
- It’s pretty ugly (it’s not something you would place on the shelf or want to have displayed on the bar).
- It’s not that easy to clean – but, having said that, we’ve got a few handy tricks to make this an awful lot easier.
How to clean the Clever Dripper
- After every brewing, you should clean a dripper with hot water and let it dry. This way, all parts, including the inner valve, will always remain relatively clean.
- Every once in a while, it’s good to clean it more thoroughly and take the dripper apart to do so. I have to admit that I didn’t know it was possible before I started preparing for this tutorial. This obviously makes it much easier to clean the valve and all the rubber parts.
Brewing tips&tricks
- You can use regular drip filters from Mellita or Moccamaster, but the clever hack is to use Hario V60 (the biggest version – number 3) and fold the bottom part. These filters are much finer, so by using these you should get better clarity in your cup of coffee.
- The next brewing tip is to add water first and then the coffee later. This way, you can make sure that all of the coffee is wet and so is extracting properly. It can also solve any problems that you may be having with clogging or slow dripping (which may be an especially common occurrence if you use a cheaper grinder that produces more coffee dust).
- Another tip, if you don’t have a proper carafe at hand, is to discard the paper filter after brewing, pour the coffee back into the Clever Dripper and let it drain again. This way it will mix well, cool down and introduce air to the coffee.
- The last tip we received was that there is actually a new version of the Clever Dripper that was released in 2019. We haven’t had a chance to use it yet, but it’s good to know that there is a new model up for grabs!